
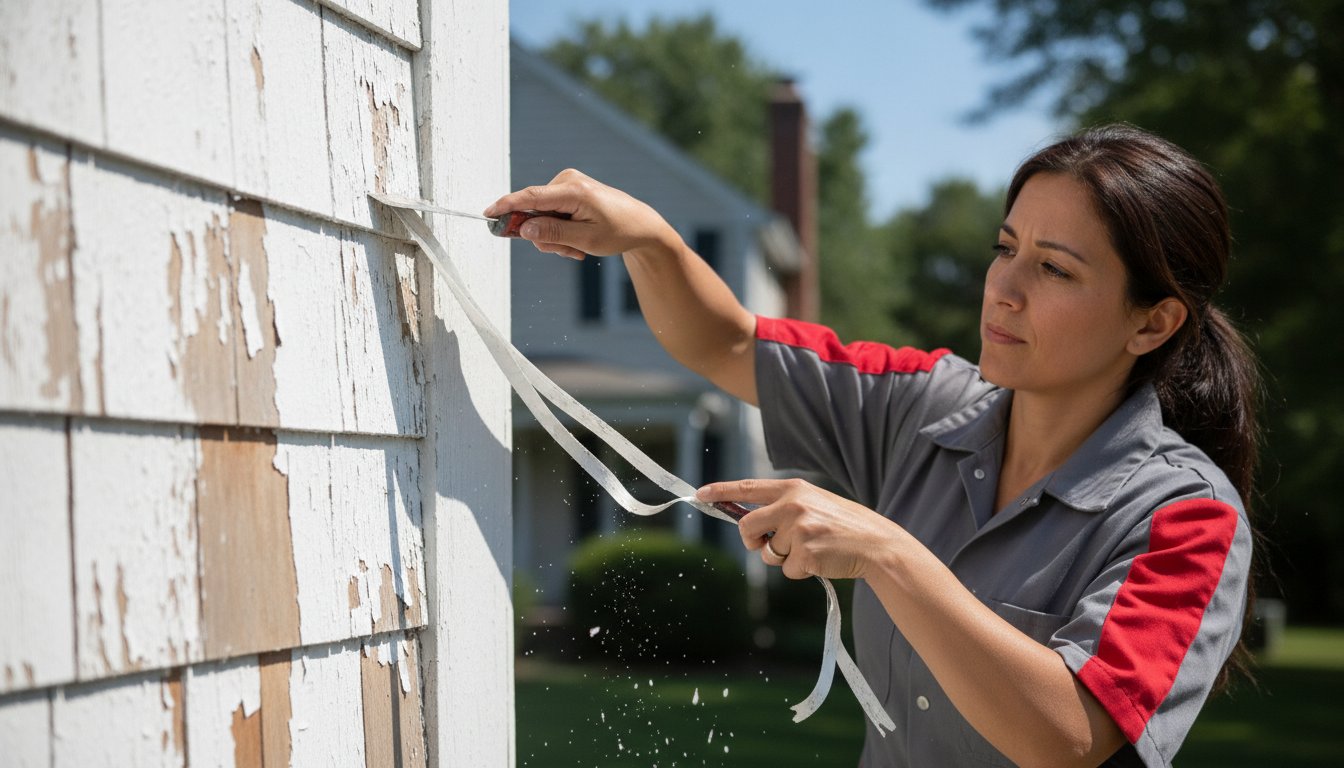
That small patch of flaking paint on your siding isn't just a cosmetic eyesore; it is a warning sign that your home's protective barrier has already failed. If you have spent your weekends scraping and patching only to see the same bubbles return six months later, you know how frustrating recurring paint failure can be. Many New Jersey homeowners worry that these surface issues are masking deeper problems like wood rot or moisture trapped behind the boards. Understanding how to fix peeling exterior paint requires more than a brush and a bucket of paint; it requires a systematic approach to surface preparation and climate-specific product selection.
We agree that your home deserves a finish that stands up to the intense humidity of our summers and the freezing cycles of our winters. This guide provides the professional methods used to diagnose the root cause of failure, repair the damage properly, and prevent future peeling. We will walk you through the essential steps of moisture testing, the importance of complying with the latest 2026 NJ VOC limits for architectural coatings, and how to determine when a project requires the precision of a professional team to protect your property's long-term value and curb appeal.
Key Takeaways
- Identify why New Jersey’s high humidity and coastal salt air are often the hidden culprits behind paint adhesion failure and surface bubbling.
- Learn the professional methodology for how to fix peeling exterior paint using a meticulous 5-step restoration framework that prioritizes deep preparation over quick patches.
- Understand the technical differences between oil-based and acrylic primers to ensure your home’s finish can withstand harsh local freeze-thaw cycles.
- Discover how to manage moisture through structural repairs and high-quality caulking to prevent recurring wood rot and protect your property's value.
- Recognize the specific safety and complexity thresholds that indicate when an exterior project requires the specialized equipment and expertise of a professional team.
Identifying the Root Cause of Peeling Exterior Paint
Peeling is technically defined as a loss of adhesion between the paint film and the underlying substrate. When this bond fails, the paint lifts away in sheets or small flakes, leaving the raw material exposed to the elements. In New Jersey, this isn't just a matter of the paint's age; it is often driven by our unique local climate. The high relative humidity and corrosive salt air along the coast accelerate the degradation of even premium coatings. Understanding these common causes of paint failure is the first step in learning how to fix peeling exterior paint for good.
Homeowners often confuse "alligatoring" with standard peeling, but they require different solutions. Alligatoring looks like a pattern of deep, interconnected cracks resembling reptile skin. It usually happens when a hard, brittle coating is applied over a softer, more flexible base layer. Standard peeling, however, involves the entire paint system separating from the wood. This distinction is vital because your repair strategy depends on whether the failure is occurring between layers of paint or between the paint and the wood itself.
The most frequent error we see in the field is applying new paint over wood that hasn't fully dried. Trapped moisture will always seek an exit. As the sun heats the siding, that water turns to vapor and pushes the new paint off the surface. This creates a cycle of frustration where new patches fail almost immediately. If you want a smooth, durable finish that lasts through NJ winters, you must address the water source first.
Moisture Intrusion: The Silent Paint Killer
Water often finds entry points behind your siding through clogged gutters or failed caulking around window frames. In many New Jersey homes, interior moisture from poorly ventilated bathrooms also migrates through walls, pushing paint off from the inside. Additionally, we frequently see splash-back damage where soil or dense foundation plantings keep the bottom boards saturated, preventing the wood from ever reaching a dry state.
Temperature Fluctuations in the Tri-State Area
The Tri-State's aggressive freeze-thaw cycles force wood siding to expand and contract constantly. This mechanical stress eventually snaps brittle paint films that have lost their elasticity. Applying paint during extreme heat or in direct sunlight can also cause thermal shock, where the coating dries too fast to bond. In Hudson County, the mild humidity of spring and autumn offers the most reliable conditions for a durable finish. Following these seasonal windows is a key part of how to fix peeling exterior paint effectively.
Professional Surface Preparation: The 5-Step Restoration Process
Preparation isn't just the first step; it's the foundation of the entire project. In the painting industry, labor accounts for roughly 85% of the total cost because professional results require disciplined groundwork. Learning how to fix peeling exterior paint correctly starts with a systematic approach that addresses the surface at a molecular level. If you skip these steps, even the most expensive premium paint will fail within a single season. This 5-step framework is the professional standard for how to fix peeling exterior paint and ensure a finish that lasts.
- Step 1: Deep Cleaning. We begin by removing mildew, dirt, and "chalking," which is the powdery residue left by old, oxidized paint. This ensures the new coating bonds to the substrate rather than a layer of dust.
- Step 2: Meticulous Scraping. Every piece of loose or failing material must be removed. We use sharp, professional-grade scrapers to reach the stable layers of previous paint or the raw wood underneath.
- Step 3: Feather-Sanding. Unlike basic DIY methods, we sand the edges where the old paint meets the bare wood. This "feathering" process creates a seamless transition, preventing the visible ridges or "craters" that often ruin the aesthetic of a repair job.
- Step 4: Final Substrate Prep. Once the dust is cleared, the surface is wiped down. We ensure the substrate is completely dry, as any lingering moisture will cause immediate bubbling.
- Step 5: Light Carpentry. We inspect for structural issues. This includes replacing cracked boards or performing light carpentry repairs to ensure the "canvas" is as healthy as the paint itself.
The Critical Importance of Power Washing
A professional-grade power washing is a non-negotiable first step. It does more than just move dirt; it strips away "dead" wood fibers that have been bleached by NJ's UV rays. These gray, weathered fibers have no structural integrity and will pull away from the house if you paint over them. However, patience is key. You must allow for a 48 to 72-hour drying window after washing. Painting too soon traps water in the wood, leading back to the moisture failure we discussed earlier.
Safety First: Testing for Lead Paint
In New Jersey, our beautiful historic housing stock often contains lead-based paint. For any home built before 1978, federal law requires adherence to lead-safe work practices to protect your family and the environment. Before you begin scraping or sanding, use an EPA-recognized lead test kit. While Hudson Line Painters provides expert guidance on these safety protocols, it's important to note that we do not perform lead abatement services. If lead is present, specialized containment and disposal methods are required by law.
Structural Repairs and Moisture Management
A paint job is only as stable as the material beneath it. If your siding is soft, cracked, or water-logged, even the most meticulous scraping won't provide a permanent solution. Learning how to fix peeling exterior paint often involves light carpentry to restore the integrity of your home's envelope. We focus on identifying boards that have reached the end of their lifespan, as painting over rot is merely a temporary mask that will fail within months. By replacing a single rotted sill or a handful of cracked cedar shingles, you prevent the moisture cycle that forces paint to lift from the surface.
One common issue in New Jersey landscapes is "ground contact." When wooden siding or trim sits too close to soil or damp mulch, it draws moisture up through capillary action. This constant saturation is a primary driver of paint failure. By trimming back these boards or adjusting the grade, we create a necessary air gap that allows the wood to breathe and stay dry. Addressing these structural flaws is just as important as the paint application itself.
- Board Replacement: We identify and remove siding that shows signs of fungal growth or structural softening.
- Joint Stabilization: Tightening loose trim boards prevents the vibration and movement that snaps paint films.
- Gutter Inspection: Ensuring water flows away from the house rather than cascading down the siding.
- Airflow Management: Checking that soffit vents are clear to prevent moisture from building up behind the boards.
Caulking and Sealing for Peace of Mind
High-quality elastomeric caulk acts as a flexible gasket between different building materials. In the NJ climate, we typically recommend siliconized acrylic for its excellent flexibility, or polyurethane for joints that require maximum durability against the elements. It is vital to seal joints around windows, doors, and corner boards, but you must never seal "weep holes" or the horizontal laps of siding. These gaps are designed to let trapped moisture escape. For professional results, we follow the two-surface bond rule: caulk must only adhere to the two opposing sides of a joint to allow for proper expansion and contraction without tearing.
Addressing Drywall and Plaster Issues
Sometimes, the struggle of how to fix peeling exterior paint reveals deeper problems inside the home. If paint is bubbling on an exterior wall, it might be a sign of an interior plumbing leak or failed roof flashing. Integrating drywall and plaster repair into your project ensures that the interior damage is addressed alongside the exterior restoration. Often, what looks like a simple paint failure is actually a gutter or roofing issue that requires resolution before the final brushstroke is applied.

Priming and Painting for Maximum Durability
The choice of primer is the most technical decision in the process of learning how to fix peeling exterior paint. For homeowners with cedar or redwood siding, an oil-based primer is essential to block tannins from bleeding through and staining the finish. If the substrate is stable but requires extra leveling, a high-build acrylic primer provides the flexibility needed to bridge small gaps and withstand NJ's aggressive temperature swings. We often see failures because homeowners rely on "Paint + Primer in One" products for repair work. While these products are suitable for maintenance coats on sound surfaces, they lack the specialized resins required to bond effectively with raw wood or heavily scraped areas.
The first coat of primer is the most important layer of the entire project. To ensure maximum adhesion, we utilize a technique called "back-brushing." Even when using a sprayer for efficiency, a craftsman follows immediately with a brush to force the coating deep into the wood grain and pores. This mechanical bond is what prevents the paint from lifting when the humidity rises. Finally, we always apply two full coats of finish paint. This provides the necessary dry film thickness to resist UV degradation and the abrasive salt air common in our coastal communities.
Choosing High-Performance Exterior Coatings
For the vast majority of New Jersey homes, 100% acrylic latex is the gold standard. It remains flexible as your home expands and contracts during the winter, unlike older oil-based finishes that become brittle and crack over time. When selecting a sheen, we typically recommend a satin or low-lustre finish. These options are better at hiding the minor surface imperfections that are inevitable in older siding, whereas high-gloss finishes tend to highlight every bump and scrape. Matching the right product to your exterior painting service goals ensures the aesthetic transformation is backed by technical durability.
The Professional Application Method
Adhesion is heavily influenced by the environment. We monitor weather windows meticulously, ensuring that the relative humidity is below 85% and temperatures remain above 50 degrees Fahrenheit for at least 24 hours to allow for proper curing. Painting in direct, mid-day sun can cause the coating to dry too quickly, which prevents it from leveling and bonding properly. Whether we use a brush for precision trim work or a sprayer for large siding sections, the goal is always a uniform, protective barrier. If you're ready to secure a finish that stands the test of time, you can schedule a professional assessment with our team today.
When to Hire Professional Exterior Painters
Deciding whether to tackle a project yourself or hire a professional often comes down to the scale of the failure. If you find that peeling covers more than 20% of your home's exterior, the issue is no longer a simple touch-up. It is a systemic failure. At this stage, attempting a DIY fix usually results in "patchwork" aesthetics that don't address the underlying moisture issues we've discussed. A professional team brings the diagnostic tools necessary to determine how to fix peeling exterior paint at its source, ensuring the new coating doesn't just hide the problem but solves it permanently.
Safety is another critical factor, particularly with New Jersey's varied architectural styles. Navigating tall ladders on the uneven terrain of a Hudson County hillside or reaching the peaks of a three-story Victorian requires specialized staging and fall-protection gear. Beyond the physical risks, the financial investment in equipment can be substantial. Buying or renting industrial-grade HEPA-filtered sanders, high-pressure sprayers, and professional staging often exceeds the cost of hiring a seasoned contractor who already owns these tools and knows how to use them with precision.
The Value of a Meticulous Process
Our systematic approach is designed to prevent the frustrating cycle of repainting every three years. We provide transparent communication and disciplined project management, so you're never left wondering about the status of your home's transformation. When you compare the cost of professional refinishing against the massive expense of a full siding replacement, the value of a high-quality paint job becomes clear. It's a smart financial choice that preserves your home's equity while providing the peace of mind that comes from a job done right the first time.
Next Steps for Your Home
If you're ready to move forward, the first step is a professional consultation. During this visit, we'll diagnose the specific failure points on your property and explain our proprietary framework for restoration. To prepare for an exterior painting estimate, it's helpful to identify any known leaks or areas where you've noticed recurring damage in the past. Our goal is to provide a safe, guaranteed transformation that offers you total comfort in your environment. You can get a free estimate from Hudson Line Painters to begin the restoration process and protect your home from the NJ elements.
Protecting Your Investment for the Long Term
Maintaining a beautiful home in the Tri-State area requires more than just an occasional coat of paint. It demands a technical understanding of how our local humidity and freeze-thaw cycles impact different building materials. By identifying the root cause of moisture intrusion and following a meticulous 5-step preparation process, you can break the cycle of recurring paint failure. Learning how to fix peeling exterior paint is ultimately about shifting from a reactive patch-job mindset to a proactive, system-based approach that prioritizes durability and structural health.
Since 2018, Hudson Line Painters has provided New Jersey homeowners with high-end technical expertise and aspirational results. We understand that your property is likely your most significant asset, and we treat every surface with the care of a true craftsman. Whether you are dealing with minor flaking or widespread adhesion loss, our team is ready to provide the professional credentials and operational discipline your project deserves. Restore your home’s exterior with a professional consultation from Hudson Line Painters and enjoy the peace of mind that comes with a guaranteed transformation. Your home’s best days are still ahead.
Frequently Asked Questions
Can I just scrape and paint over peeling areas?
Simply scraping and painting over the damage results in a poor aesthetic finish and premature failure. You must feather-sand the edges of the remaining paint to create a smooth transition; otherwise, the "craters" will be visible through the new coat. Understanding how to fix peeling exterior paint correctly involves a full restoration of the bond between the substrate and the coating, which requires proper priming after the surface is smooth.
Is peeling paint a sign of wood rot?
Peeling paint is frequently a precursor or a symptom of wood rot because both issues are driven by excessive moisture. When paint fails, the underlying wood is left unprotected against NJ's rain and humidity, which eventually leads to fungal growth and structural softening. If you notice the wood is dark, spongy, or crumbles when pressed with a screwdriver, you are likely dealing with rot that requires replacement before painting.
How much does it cost to fix peeling exterior paint in New Jersey?
The total investment for a professional restoration depends on the square footage of your home, the height of the structure, and the extent of the failure. Costs are primarily driven by the labor required for meticulous scraping and sanding rather than the price of the paint itself. Projects involving extensive wood replacement or light carpentry will naturally require a higher budget than a standard maintenance repaint.
What is the best temperature to fix peeling paint?
The optimal temperature range for paint application and curing is between 50°F and 85°F with low humidity. In New Jersey, we prefer working in the spring or fall to avoid the "thermal shock" caused by direct summer sunlight, which can cause the paint to dry too quickly and fail to bond. Always check the manufacturer's label, as some modern acrylics are rated for temperatures as low as 35°F, though warmer conditions are more reliable.
Should I use a power washer to remove peeling paint?
A power washer is an excellent tool for deep cleaning and removing loose flakes, but it shouldn't be your only method for stripping paint. Using too much pressure can gouge the wood or force water deep into the joints, which leads to long-term moisture problems. We use it to remove chalking and surface contaminants, then follow up with hand-scraping and sanding for a precision finish that lasts.
How long should I wait for wood to dry after power washing?
You should wait at least 48 to 72 hours before applying any primer or paint after a professional power washing. This window allows the wood fibers to release trapped moisture that would otherwise cause the new coating to bubble and peel almost immediately. For the most accurate results, we recommend using a moisture meter to ensure the wood's moisture content is below 15% before you begin the priming phase.
Why does my paint keep peeling even after I fixed it?
Recurring failure usually means the root cause of the moisture intrusion was never addressed. If you have leaking gutters, failed caulking, or poor interior ventilation, the wood will continue to saturate and push the paint off from the inside out. It is also possible that "dead" gray wood fibers weren't sanded away during the previous repair, which prevents the primer from forming a permanent bond with the siding.
Can I use interior primer on my exterior siding?
No, you must never use interior primer on exterior surfaces. Interior products aren't formulated to handle the intense UV exposure or the dramatic temperature fluctuations common in the Tri-State area. They lack the flexibility and mildewcides necessary to protect your siding. Using them will significantly shorten the lifespan of your project and lead to a complete failure of the new paint film within a single season.


