

When a wallpaper border tears into tiny pieces, leaves sticky residue, or refuses to lift, it’s tempting to scrape harder or soak the wall. That can turn a frustrating job into damaged paint, softened drywall, or extra repairs. The safest way to remove a stubborn wallpaper border is to stop pulling and figure out what’s holding it in place. Knowing how to remove stubborn wallpaper border starts with matching your approach to the border’s material, adhesive, and the wall beneath it.
First, look for clues that the border needs a different removal method, then test a small area before continuing. This guide covers gentle peeling, controlled moisture, when steam may help, and how to clean adhesive residue and inspect the wall before painting. If the surface begins to lift, crumble, or stay damp, pause. Pushing on can cause more harm than good. A careful process helps protect the wall and prepare it for a smooth new finish.
Key Takeaways
- Uneven peeling and lingering glue can signal that the border’s adhesive is still holding firm. Identify the likely cause before choosing how to proceed.
- Learn how to remove stubborn wallpaper border with a careful sequence that protects nearby surfaces and tests the wall before you continue.
- Compare water, wallpaper remover, and controlled steam to find an approach suited to the border and the wall beneath it.
- Clean leftover adhesive gently and test your solution in a small area to help protect the finish and prepare the wall for paint.
- Recognize when damage, softening, or repeated resistance means it’s time to stop DIY removal and consider professional wallpaper removal or wall repair.
Why Is Your Wallpaper Border So Stubborn? Identify the Problem First
A wallpaper border that peels unevenly, breaks into small pieces, or leaves sticky patches behind can test your patience. It’s usually stubborn because its bond to the wall remains strong. Before deciding how to remove stubborn wallpaper border, look for clues about the paper, adhesive, and wall surface. The right approach depends on all three.
Several things may be holding the border in place. Paint can overlap its edges and form a bridge. Durable or washable coatings can keep moisture from reaching the adhesive, while old glue may remain firmly bonded. There may also be multiple layers of paper or adhesive, so lifting the visible border doesn’t release what’s underneath. Adhesives vary in composition and behavior; for background, see what wallpaper adhesive is made of.
How to tell what is keeping the border attached
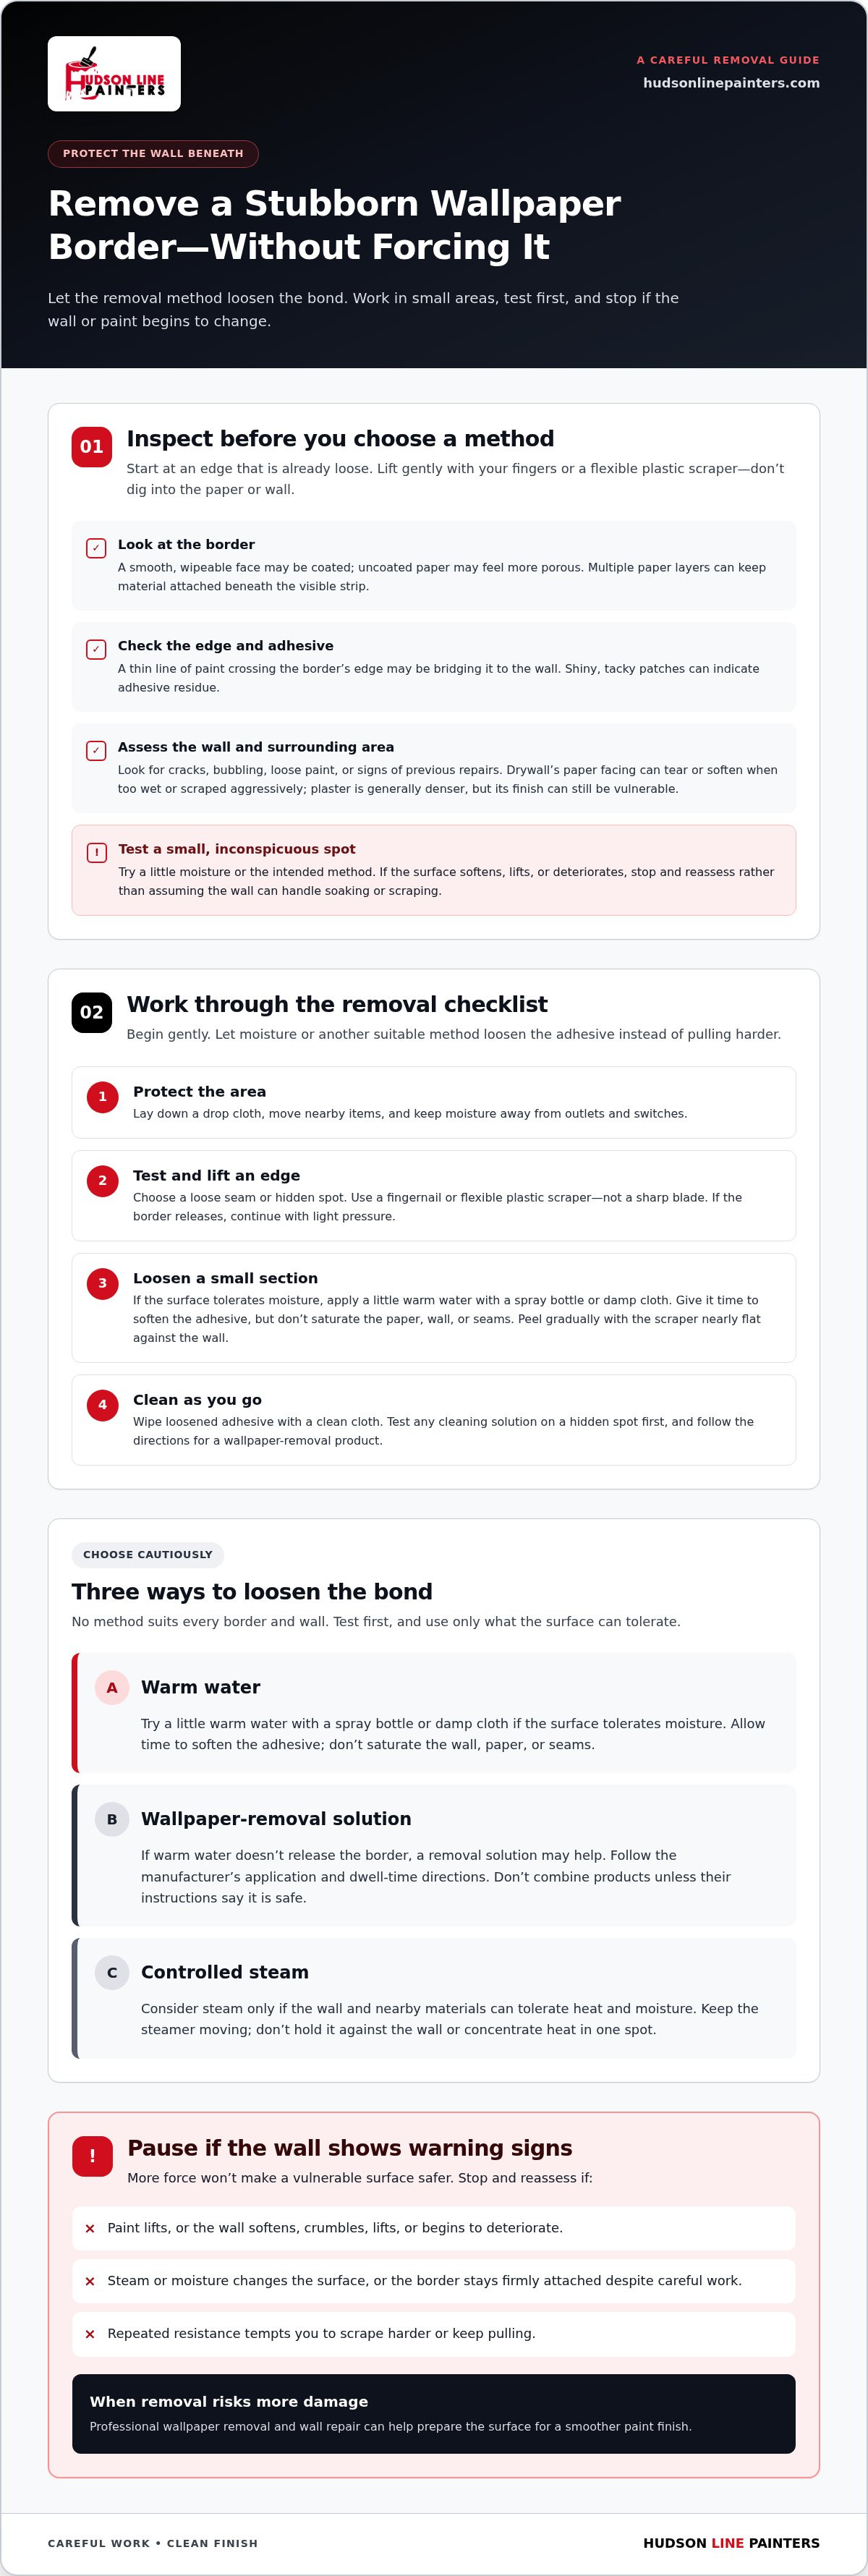
Start with an edge that’s already loose. Use your fingers or a flexible plastic scraper to lift it gently, then inspect the underside and the wall without digging into either surface. Look for separate paper layers, a thin line of paint crossing the border’s edge, or shiny, tacky adhesive. The border’s face offers clues too: a smooth, wipeable surface may be coated, while uncoated paper may look and feel more porous.
If paint bridges the edge, don’t yank the border. Carefully separate the painted edge with a flexible tool, working slowly to avoid pulling up the surrounding finish. A tear that stops abruptly or exposes another layer can indicate that the bond or construction changes along the strip.
Check the wall before choosing a removal method
Identify the surface as best you can without cutting into it. Drywall has a paper facing that can tear or soften if it gets too wet or is scraped aggressively. Plaster is generally denser, but its paint or finish may still be vulnerable. If you can’t tell what’s behind the border, use a cautious test rather than assuming the wall can handle soaking or scraping.
Before testing, check the surrounding area for cracks, bubbling, loose paint, or signs of previous repairs. Choose a small, inconspicuous spot and apply a little moisture or your intended removal method. Watch how the border and wall respond. If the surface softens, lifts, or begins to deteriorate, stop. Removal may expose adhesive residue or minor damage, and the wall may need preparation before painting. Careful inspection helps you choose the next step while protecting the finish underneath.
How to Remove a Stubborn Wallpaper Border Step by Step
Work slowly and let the removal method loosen the bond instead of forcing the paper away. Gather a drop cloth, spray bottle, clean cloths, and a flexible plastic scraper. Test your approach before working across the full border to help protect the wall and prepare it for its next finish.
Start with the gentlest removal method
Protect nearby flooring and electrical fixtures from moisture. Then follow these steps, starting with a small test area.
- 1. Protect the area. Lay down a drop cloth and move nearby items out of the way. Keep moisture away from outlets and switches.
- 2. Test an edge. Choose a loose seam or inconspicuous spot. Lift the edge gently with a fingernail or flexible plastic scraper, not a sharp blade. If the border starts to release, continue with light pressure.
- 3. Loosen a small section. If the surface tolerates moisture, apply a little warm water with a spray bottle or damp cloth. Give it time to soften the adhesive, but don’t saturate the paper, wall, or seams. Lift the loosened edge and peel gradually, keeping the scraper nearly flat against the wall.
- 4. Clean as you go. Wipe away loosened adhesive with a clean cloth. For stubborn residue, follow a suitable wallpaper-removal product’s directions or a careful guide to removing residual wallpaper glue. Test any cleaning solution on a hidden spot first.
Escalate carefully when peeling alone does not work
If warm water doesn’t release the border, a wallpaper-removal solution may help. Follow the manufacturer’s directions, including guidance on application and dwell time, and test it before treating a larger area. Don’t combine products unless their instructions say it’s safe.
Controlled steam is another option only if the wall and nearby materials can tolerate heat and moisture. Keep the steamer moving. Don’t concentrate heat on one spot or hold it against the wall. Work in small sections and use the flexible scraper gently as the adhesive loosens. Stop if paint lifts, the wall softens, or the surface changes. Repeated force won’t make a risky surface safer.
The key to how to remove stubborn wallpaper border without unnecessary damage is to pause when the method stops working and reassess, rather than scraping harder. If the border remains firmly attached or removal begins to harm the wall, professional wallpaper removal and wall repair can help prepare the surface for a smoother paint finish. Learn about professional wallpaper removal as an alternative to risking further damage.
Water, Steam, or Wallpaper Remover: Which Method Fits the Border?
The best way to remove a stubborn wallpaper border depends on how its surface responds and how much moisture or heat the wall can tolerate. A washable or coated border may repel water, while a porous or fragile wall finish can be damaged by too much moisture. Test a small, hidden area first. No method is right for every border and wall.
| Method | May suit | Preparation and limitations | Care required |
|---|---|---|---|
| Warm water | Porous paper borders where a test shows moisture softens the adhesive. | Apply a small amount with a spray bottle or damp cloth. Coated or washable borders may resist it. | Use minimal liquid, wipe drips promptly, and avoid soaking drywall or seams. |
| Wallpaper remover | Borders that remain attached after a cautious water test. | Choose a product intended for wallpaper removal and follow its label. It may not suit every wall finish. | Test first, use only as directed, and don’t mix it with other cleaning products. |
| Controlled steam | Some firmly bonded borders when the wall and nearby materials can tolerate heat and moisture. | Requires careful handling; heat and moisture can affect paint or a vulnerable surface. | Keep steam moving, avoid prolonged contact in one spot, and stop if the surface changes. |
When water or wallpaper-removal solution may help
A small test patch tells you whether moisture can reach and soften the adhesive. If the border lifts more easily after a brief wait, work in small sections rather than wetting a long run at once. Use only enough liquid to dampen the paper, and wipe drips promptly, especially near seams where moisture can seep behind the border.
If water has little effect, a wallpaper-removal solution may be worth testing. Read and follow the product label, including its directions for application and wait time. Don’t combine remover with household cleaning products; mixing chemicals can create unwanted reactions and may damage the finish.
When heat or steam needs extra caution
Steam may soften adhesive, but it can also loosen paint or affect a wall surface that’s already weak. Keep the steamer moving and use brief passes rather than concentrating heat on one spot. Porous, fragile, or previously damaged surfaces need particular care with both heat and moisture.
Stop if you notice bubbling, discoloration, softening, or separation of the wall surface. These are signs that the method may be causing damage, not simply loosening the border. A cautious test and close observation help you choose how to remove stubborn wallpaper border without treating any method as universally safe.
How to Remove Leftover Adhesive and Protect the Wall
Once the border is off, don’t rush straight to paint. A thin, glossy or tacky layer of adhesive can remain even when the wall looks clean, and paint applied over glue may not adhere evenly. Gentle cleanup and a full drying period help reveal the wall’s condition and prepare it for a smoother finish.
Clean stubborn wallpaper paste without gouging the surface
Start with a clean cloth dampened with a suitable cleaning solution. Test it on an inconspicuous spot, then soften the residue gradually and wipe rather than scraping hard. Use a plastic scraper only if needed, keeping it nearly flat and applying light pressure so it doesn’t gouge the surface or tear drywall paper.
Work in small areas and use fresh sections of cloth as adhesive transfers onto them. Follow the cleaner’s directions for wiping or rinsing, and don’t leave product behind. Avoid soaking the wall, especially around seams or areas where the surface is already fragile. If glue remains stubborn, pause and reassess instead of increasing pressure or repeatedly wetting the same spot. For broader removal and preparation context, refer to a professional wallpaper removal guide.
Know when the wall needs repair before painting
Let the wall dry fully before judging the result. Light residue may need another careful cleaning, but physical damage calls for a different next step. Look for torn drywall paper, gouges, loose plaster, cracks, persistent sticky patches, or damp areas. Address these signs before covering the wall with paint.
Damaged drywall or plaster may need repair, followed by a suitable primer before painting. Primer helps prepare a repaired or exposed surface for a more consistent finish, but it won’t fix loose material or remove adhesive that’s still present. If the wall remains damp, soft, or unstable, give it more time and avoid painting until the surface is ready. See drywall and plaster repair guidance for more information on assessing and preparing damaged areas.
A careful inspection after cleanup is part of how to remove stubborn wallpaper border without carrying hidden problems into the next finish. Professional wallpaper removal and wall repair can help when residue persists or the surface has been damaged during removal. Hudson Line Painters provides wallpaper removal and drywall and plaster repair for homes and businesses in Hudson County, Union County, and Bergen County, including Hoboken, Edgewater, Fort Lee, Teaneck, Hackensack, Englewood, Cliffside Park, Leonia, Palisades Park, and Ridgefield.
When to Stop DIY Removal and Get the Wall Ready for Its Next Finish
A border that won’t release is not a reason to scrape harder. If each attempt pulls up more paint or wall material, pause before a small removal job becomes a larger repair. Knowing how to remove stubborn wallpaper border also means recognizing when the safest next step is to stop.
- Damage is spreading: Paint peels beyond the border, drywall paper tears, or scraping creates gouges.
- The wall softens or lifts: Moisture or heat causes bubbling, loose material, or surface separation.
- Repeated tests fail: The border stays firmly attached despite careful use of a suitable method.
- The job is more complex than expected: A large area, several layers, or a delicate wall makes controlled removal difficult.
DIY removal or professional wallpaper removal?
DIY gives you control over the pace and lets you work a small section at a time, but it can demand patience and close attention to the wall. Multiple layers, extensive borders, and fragile surfaces can make it harder to remove material without damage. Professional wallpaper removal uses a careful approach to the paper and underlying surface. Hudson Line Painters provides wallpaper removal, along with drywall and plaster repair when the wall needs attention afterward.
Stop if the surface is changing or the border repeatedly resists gentle methods. Continuing with force can increase damage and add preparation work before painting.
Prepare the wall for a smooth painted finish
Once the remaining border material is removed, clean off adhesive, let the wall dry fully, and inspect it in good light. Repair torn drywall paper, gouges, or cracked plaster as needed. After repairs dry, sand suitable areas smooth and remove dust. Apply primer where the repaired or exposed surface requires it, then paint. The exact preparation depends on the wall’s condition.
A clean, sound surface helps paint go on more consistently. Hudson Line Painters can carry the project from removal and wall assessment through professional interior painting, with wall repair where needed.
Contact Hudson Line Painters about wallpaper removal
Protect the Wall and Set Up Your Next Finish
The safest approach to how to remove stubborn wallpaper border is to identify what’s holding it in place, test a gentle method, and avoid forcing paper that won’t release. Use moisture or heat cautiously, clean away adhesive, and let the wall dry before checking for damage. If the surface softens, lifts, or shows spreading damage, stop rather than risk a more difficult repair.
A clean, sound wall is the foundation for a smoother paint finish. Hudson Line Painters provides professional wallpaper removal, drywall and plaster repair, and interior painting, helping take the wall from removal through preparation and its next finish.
For wallpaper removal, wall repair, and interior painting in Hudson County, Union County, Bergen County, Hoboken, Edgewater, Fort Lee, Teaneck, Hackensack, Englewood, Cliffside Park, Leonia, Palisades Park, and Ridgefield, contact Hudson Line Painters.
Frequently Asked Questions
How do you remove a wallpaper border that will not peel off?
Start by testing a loose edge and identifying whether paint, a coated surface, or multiple paper layers are keeping the border attached. If the wall tolerates moisture, dab a small test area with warm water and give it time to soften the adhesive. Lift the paper gradually with a flexible plastic scraper. For how to remove stubborn wallpaper border safely, avoid forceful scraping and stop if paint or wall material begins to lift.
Can you use vinegar and water to remove a stubborn wallpaper border?
Vinegar and water may help loosen some wallpaper adhesive, but they won’t work equally well on every border. A washable or coated surface may prevent the mixture from reaching the glue. Test a small, hidden area first, use minimal moisture, and wipe drips promptly. Take extra care on drywall, which can be damaged by excess water. Don’t mix vinegar with commercial cleaners or other products.
Will a wallpaper steamer damage drywall?
Yes, a wallpaper steamer can damage drywall if heat or moisture is concentrated or applied for too long. Drywall’s paper facing can soften, bubble, or separate, especially if it is already weak or damaged. If you use steam, test a small area, keep the steamer moving, and avoid prolonged contact in one spot. Stop if the surface softens, bubbles, discolors, or lifts.
How do you remove wallpaper border adhesive after the paper comes off?
Use a clean cloth and a suitable cleaning solution to soften and wipe away adhesive gradually. Test the solution on an inconspicuous spot first, and follow its directions for rinsing or wiping so no cleaner remains. Avoid aggressive scraping, which can gouge the wall or tear drywall paper. Let the wall dry fully before inspecting it; remaining tacky patches may need another careful cleaning.
What happens if you leave wallpaper glue on the wall before painting?
Leftover glue can interfere with paint adhesion and contribute to an uneven finish. The surface may feel tacky or look shiny, and paint may not settle consistently over those patches. Clean away visible adhesive, then let the wall dry fully before preparing it for paint. If residue remains, don’t simply cover it with primer or paint; check the surface and clean it again as appropriate.
Can you paint over a wallpaper border instead of removing it?
You can paint over a border in some situations, but the raised edges and seams may still show through the finished paint. Loose edges, surface texture, or adhesive problems can also affect the result. If you’re considering this shortcut, first check that the border is firmly attached and the wall is clean and sound. Removing the border is generally a better route when you want a smooth, consistent painted surface.
When should I hire a professional to remove a wallpaper border?
Consider professional help if careful tests repeatedly fail, the border has multiple layers, or removal starts tearing drywall paper, lifting paint, or loosening plaster. Hudson Line Painters provides wallpaper removal and drywall and plaster repair, with interior painting for the next finish. The company serves homeowners and businesses in Hudson County, Union County, and Bergen County, including Hoboken, Edgewater, Fort Lee, Teaneck, Hackensack, Englewood, Cliffside Park, Leonia, Palisades Park, and Ridgefield.


