

What if the finish you see on cabinet doors depends less on the final coat than on the work done before it? A durable result starts with careful preparation, and understanding the cabinet painting process step by step can help you spot what matters before work begins.
It’s reasonable to wonder how much cleaning and sanding are involved, whether the finish will resist chips and brush marks, and how long your kitchen may be disrupted. Cabinet painting is a sequence of connected stages, not simply a coat of paint on the doors. Skipping or rushing preparation can affect how well the coating adheres and how it looks over time.
This guide walks through the project from the initial cabinet inspection to preparation, priming, painting, curing, and reinstallation. You’ll learn which details to ask about, what can influence the finished surface, and how to plan for limited kitchen use while work is underway. Whether you’re weighing a DIY approach or reviewing a proposal from a local painter, knowing the sequence makes it easier to compare plans and set clear expectations.
Key Takeaways
- The cabinet painting process step by step can help you evaluate the project scope, from cabinet condition and existing finish to the result you want.
- Protecting the kitchen, labeling parts, and removing grease before sanding helps set up surfaces for coating.
- Primer drying time and the choice between spraying and brush-or-roller application can affect the finish and project setup.
- Compare DIY and professional plans by looking at preparation, workspace control, equipment, and schedule management.
- Before reinstallation and regular use, follow coating instructions and use gentle cleaning practices to care for the finish.
Cabinet Painting Process Step by Step: What Happens Before Work Begins?
A clear project sequence helps you judge the scope, plan around kitchen disruption, and understand what careful workmanship involves. Before painting begins, the painter should assess the cabinet material, condition, existing finish, and the look you want. These details influence preparation and coating choices, so a thorough evaluation is more useful than a one-size-fits-all plan.
The cabinet painting process step by step is a surface-refinishing project, not cabinet replacement or a structural kitchen renovation. A painter should make clear which cabinet surfaces are included and flag repairs or conditions that may need attention before coating. For an overview of the principles behind preparing and coating wood, see this guide to the wood finishing process. Hudson Line Painters’ cabinet painting service is relevant for homeowners considering professional refinishing.
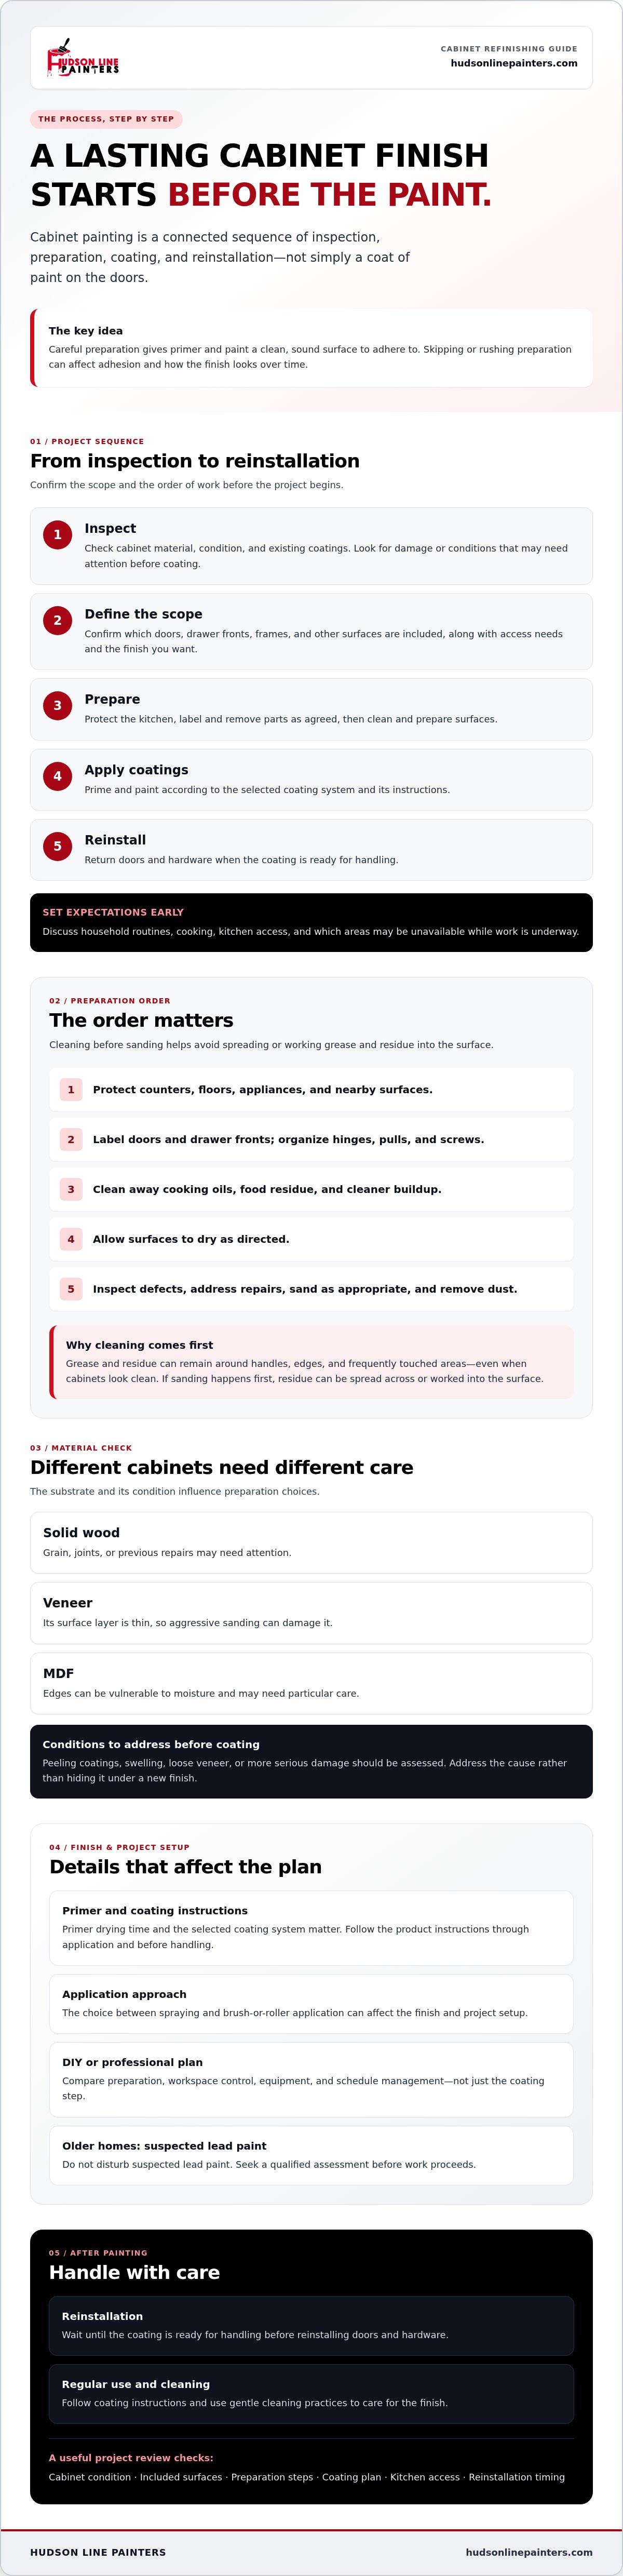
Before work begins, ask how the project will move from inspection through reinstallation. A typical sequence includes:
- 1. Inspect: Check cabinet condition, materials, and existing coatings.
- 2. Define the scope: Confirm which doors, drawer fronts, frames, and other surfaces are included.
- 3. Prepare: Protect the room, label and remove parts as agreed, then clean and prepare surfaces.
- 4. Apply coatings: Prime and paint according to the selected system and its instructions.
- 5. Reinstall: Return doors and hardware when the coating is ready for handling.
Which cabinets are suitable for painting?
Solid wood, veneer, and MDF can all be candidates, but they don’t call for identical preparation. Solid wood may have grain, joints, or previous repairs to address. Veneer has a thin surface layer, so aggressive sanding can damage it. MDF edges can be vulnerable to moisture and may need particular care. Peeling coatings, swelling, or loose veneer are warning signs. Assess and address the cause before painting rather than hiding it under a new finish.
What should a project assessment cover?
Ask the painter to document cabinet condition, included surfaces, access needs, and the expected finish so you can compare the proposal with your priorities. Confirm whether doors and drawer fronts will be removed, how hardware will be labeled and stored, and which areas of the kitchen may be unavailable. Discuss household routines and how the work could affect cooking and access. In an older home, if lead paint is suspected, don’t disturb it; seek a qualified assessment before work proceeds.
How to Prepare Kitchen Cabinets for Paint in a New Jersey Home
Preparation protects your kitchen and gives primer and paint a clean, sound surface to adhere to. In the cabinet painting process step by step, the order matters: protect the room, label and remove parts, clean away residue, assess and repair defects, then sand as appropriate and remove dust. Rushing past cleaning can leave grease under the coating, which may interfere with adhesion.
Cleaning, labeling, and protecting the kitchen
Before work starts, agree on which surfaces are included and how the kitchen will remain usable during the project. Cover counters, floors, appliances, and nearby surfaces to guard against dust and coating splatter. Label each door and drawer front so it can return to its original position, and keep hinges, pulls, and screws organized together. A protected work area and a clear labeling system help prevent mix-ups during reinstallation.
Clean cabinet surfaces thoroughly before sanding. Cooking oils, food residue, and cleaner buildup can remain around handles, edges, and frequently touched areas even when cabinets look clean. If sanding happens first, residue can be spread across the surface or worked into it. Use a cleaning approach suitable for the cabinet material, then allow surfaces to dry as directed before moving to the next step.
Repairing, sanding, and priming cabinet surfaces
Once clean, inspect for small dents, scratches, chipped edges, and old failing coating. Minor defects may need suitable filler and smoothing, while more serious damage should be assessed before painting. Sanding requirements depend on the substrate, the condition and type of existing finish, and the coating system’s instructions. The goal is to prepare the surface without cutting through veneer or damaging cabinet edges. Remove sanding dust before priming.
Primer should be compatible with both the cabinet material and the planned topcoat. Ask what the proposed bonding primer is intended to adhere to and whether it suits your cabinets. Follow product instructions for application and drying; don’t assume every surface needs the same sanding or primer approach.
New Jersey humidity can affect how quickly surfaces dry, but conditions vary from home to home. Ask the painter how they’ll check the work area and follow the coating label’s guidance for temperature, humidity, and recoat times rather than relying on a fixed timetable. For a practical reference on lead-safe work practices, consult the U.S. Environmental Protection Agency. If an older home has suspected lead paint, don’t disturb it; seek a qualified assessment before sanding or other work proceeds.
For homeowners comparing preparation plans, Hudson Line Painters provides kitchen cabinet refinishing. You can also learn more about Hudson Line Painters as you consider what to discuss with a local painter.
How Cabinet Paint Is Applied for a Smooth, Consistent Finish
Once cabinet surfaces are clean and prepared, the coating stage turns that groundwork into the visible finish. In the cabinet painting process step by step, primer and paint each have a role: primer helps the coating adhere, while compatible cabinet paint builds the color and protective surface. The right approach depends on the cabinet material, existing finish, product system, and conditions in the work area.
Choosing a cabinet coating and application method
Primer isn’t a shortcut around surface preparation. It should be suitable for the cabinet substrate and existing coating, and it needs to dry for the time stated on its label before the next layer goes on. The cabinet coating should also be compatible with that primer. Ask the painter which products are proposed and how their instructions will guide the sequence.
Spraying can provide an even appearance across broad, flat surfaces, but it calls for careful masking, controlled application, and suitable workspace conditions. Brush-and-roller application may suit projects where spray setup isn’t practical, though technique and the tools used can affect texture and visible marks. Neither method is automatically best for every kitchen. Compare the expected finish, the setup required, and how the method fits your home and cabinet details.
Coatings are generally applied in controlled layers rather than one heavy coat. Allow the label-directed drying time between coats, and follow instructions for recoat windows and environmental limits. Applying another coat too early, or outside the product’s recommended conditions, can compromise the finish. Ask how the proposed application method and coating system will work together, rather than judging the plan by method alone.
Drying, curing, and checking the finish
Drying, safe handling, reinstallation, and full curing are separate milestones. The time needed depends on the coating and room conditions, so avoid relying on a generic schedule. Confirm when doors can be handled and rehung, and when cabinets can return to heavier everyday use. Follow the product directions and the painter’s guidance based on those directions.
Dry-to-touch means the surface feels dry; fully cured means the coating has had time to develop its intended final properties. A surface can feel dry before it’s ready for rough handling or regular wear. Keep that distinction in mind when planning to reload drawers, attach hardware, or clean newly painted surfaces.
Before accepting the finished work, inspect doors and frames under consistent lighting. Look across flat areas for uneven coverage or visible application marks, then check edges, corners, and profiles where missed spots or buildup can show. Ask how any concerns will be reviewed before the pieces are reinstalled. A clear explanation of product instructions, application choices, and readiness for use helps set realistic expectations for the finish.
DIY vs. Professional Cabinet Painting: What Makes the Process Different?
Choosing between DIY and professional work depends on more than the paint aisle. The cabinet painting process step by step involves cleaning, surface preparation, coating, managing drying time, and keeping doors and hardware organized. Cabinet condition, the layout, your experience, and the workspace available all affect the effort required and the finish you can reasonably expect.
Paint selection matters, but it can’t make up for grease left on a surface, poor adhesion, rushed drying, or uneven application. A sound plan accounts for the whole project. Compare approaches by asking who will handle preparation, how dust and overspray will be controlled, what tools suit the application method, and how the schedule will work around reduced kitchen access.
When a DIY cabinet-painting project may be manageable
DIY may be a reasonable option for a smaller project with cabinets in sound condition, a suitable place to work, and enough time to complete each stage without rushing. You’ll need a clear system for labeling doors, organizing hardware, protecting nearby surfaces, and ventilating the work area as product instructions require. Plan for drying intervals and the practical inconvenience of having some cabinets or kitchen areas out of use.
Before starting, read the coating and primer instructions, check that the products suit the cabinet material, and be realistic about repairs and surface preparation. If your available workspace is also the kitchen, consider where removed doors can be kept clean and undisturbed between coats. For wider planning considerations, read the complete cabinet refinishing guide.
When to consider a professional cabinet painter
Consider getting a professional assessment if the kitchen has extensive cabinetry, damaged or peeling coatings, detailed profiles, or a layout that makes removal and reassembly difficult. An organized project plan can clarify how doors and hardware will be identified, how surrounding areas will be protected, and how preparation and coating stages fit together. Ask what’s included, what conditions might change the scope, and how the kitchen will be affected during the work.
Review proposals for process detail, not just the paint name or final color. A clear explanation of surface preparation, application options, drying expectations, and reinstallation gives you useful points to compare with a DIY plan. If your project also involves painting other areas of the home, see the company’s residential painting services for that broader scope.
After Cabinet Painting: Reinstallation, Care, and Hiring a Local Painter
Reinstallation is part of the finish, not an invitation to put cabinets straight back into heavy daily use. Doors, drawer fronts, and hardware should be handled and refitted according to the coating manufacturer’s instructions and the painter’s guidance. Ask when components can be rehung, when drawers can be loaded, and when the finish is ready for regular cleaning. Dry-to-touch doesn’t necessarily mean fully cured.
How to protect freshly painted cabinets
For care during the early stages, follow the instructions for the specific coating before washing surfaces, loading drawers, or repeatedly handling doors. Once cleaning is appropriate, use a gentle method and test any cleaner on an inconspicuous spot first. Wipe spills promptly, and avoid harsh abrasives that can scratch or dull the finish. Request written care guidance so household members know what products and handling to avoid.
Questions to ask a New Jersey cabinet-painting contractor
A useful proposal explains the work from preparation through cleanup, rather than focusing only on color. Ask how the contractor will clean, prepare, prime, and coat your cabinets, and how the proposed products suit the existing surfaces. Clarify how counters, appliances, and nearby areas will be protected, what the project schedule depends on, and how the household can access the kitchen while work is underway.
Before agreeing to a plan, confirm who labels and removes doors, keeps hardware organized, handles reinstallation, and cleans the work area. Ask what could change the scope, such as concealed damage discovered during preparation, and how that would be discussed with you. Clear answers help you understand both the finish expectations and the practical arrangements at home.
The cabinet painting process step by step should include a clear handoff: what has been completed, what care the coating needs, and when normal use can resume. If you want a service-specific overview to compare with your project priorities, review Hudson Line Painters’ cabinet painting service.
Plan Your Cabinet Refresh with Confidence
A reliable cabinet finish begins before the first coat: assess the cabinet surfaces, agree on what the project includes, and make sure preparation and product instructions guide the work. The cabinet painting process step by step also includes realistic expectations for drying, reinstallation, and gentle care afterward. These details help you compare a DIY plan with a professional proposal and plan for kitchen disruption.
Hudson Line Painters has provided kitchen cabinet refinishing since 2018, serving communities in Hudson, Union, and Bergen Counties. If you’re considering a cabinet refresh, review the project scope, preparation approach, coating plan, and reinstallation details with your painter before work begins.
With a clear process and thoughtful planning, you can move toward a kitchen finish that feels right for your home.
Frequently Asked Questions
How long does the cabinet painting process take?
There’s no single timeline that fits every kitchen. Cabinet count, surface condition, preparation needs, application method, product drying and curing instructions, and room conditions can all affect the schedule. Ask for a project plan that separates active work from drying time and identifies when doors will be removed and reinstalled. This makes it easier to plan kitchen access without relying on a universal day count.
Do cabinets need to be sanded before painting?
Often, cabinets need some surface preparation, but sanding isn’t identical for every material or finish. Depending on the substrate and existing coating, a painter may use scuff-sanding or another method approved for the selected products. Surfaces should also be clean and free of sanding dust before coating. Ask the contractor to explain why the preparation method suits your specific cabinets, especially if they have a thin veneer or delicate finish.
Is primer necessary when painting kitchen cabinets?
Primer is commonly used to support adhesion and provide a suitable base, particularly when the existing coating or cabinet material calls for it. The appropriate primer depends on the substrate, previous finish, and planned topcoat, so one product shouldn’t be assumed to suit every surface. Ask how the primer and topcoat will be checked for compatibility, and have the painter explain the required drying and recoating instructions.
Can you paint laminate or MDF cabinets?
Some laminate and MDF cabinets can be painted, but the condition of the surface and the preparation plan matter. Loose laminate, swelling, peeling, or damaged edges may affect whether a sound finish is achievable and should be assessed before work begins. The primer and coating need to suit the material. If you’re unsure what your cabinets are made of, ask a painter to inspect them rather than assuming every surface can be treated alike.
Should cabinet doors be removed before painting?
Removing doors and drawer fronts can make it easier to prepare and coat their edges, and it can help keep work organized. Each component should be labeled so it returns to its original position, while hinges, pulls, and screws are stored safely. The right setup depends on the project and application method. Before work starts, confirm who will remove, label, store, and reinstall the parts, and how the kitchen will be protected.
Is spraying better than brushing cabinets?
Neither method is best for every cabinet-painting project. Spraying can create consistent coverage when the workspace, masking, and equipment are managed appropriately. Brush-and-roller application may suit different project conditions and can involve less specialized setup. Ask what finish to expect on your specific cabinet style and how the work area will be controlled. Compare the complete preparation and coating plan, not just the application method.
How should I care for cabinets after they are painted?
Follow the coating manufacturer’s care instructions and your painter’s guidance, especially while the finish is curing. Avoid heavy handling, harsh cleaners, and abrasive pads until the coating is ready for normal use. After that, clean gently and wipe up spills promptly. Ask which products are suitable for the specific coating used. Hudson Line Painters provides kitchen cabinet refinishing in communities across Hudson, Union, and Bergen Counties, including nearby New Jersey areas.


