
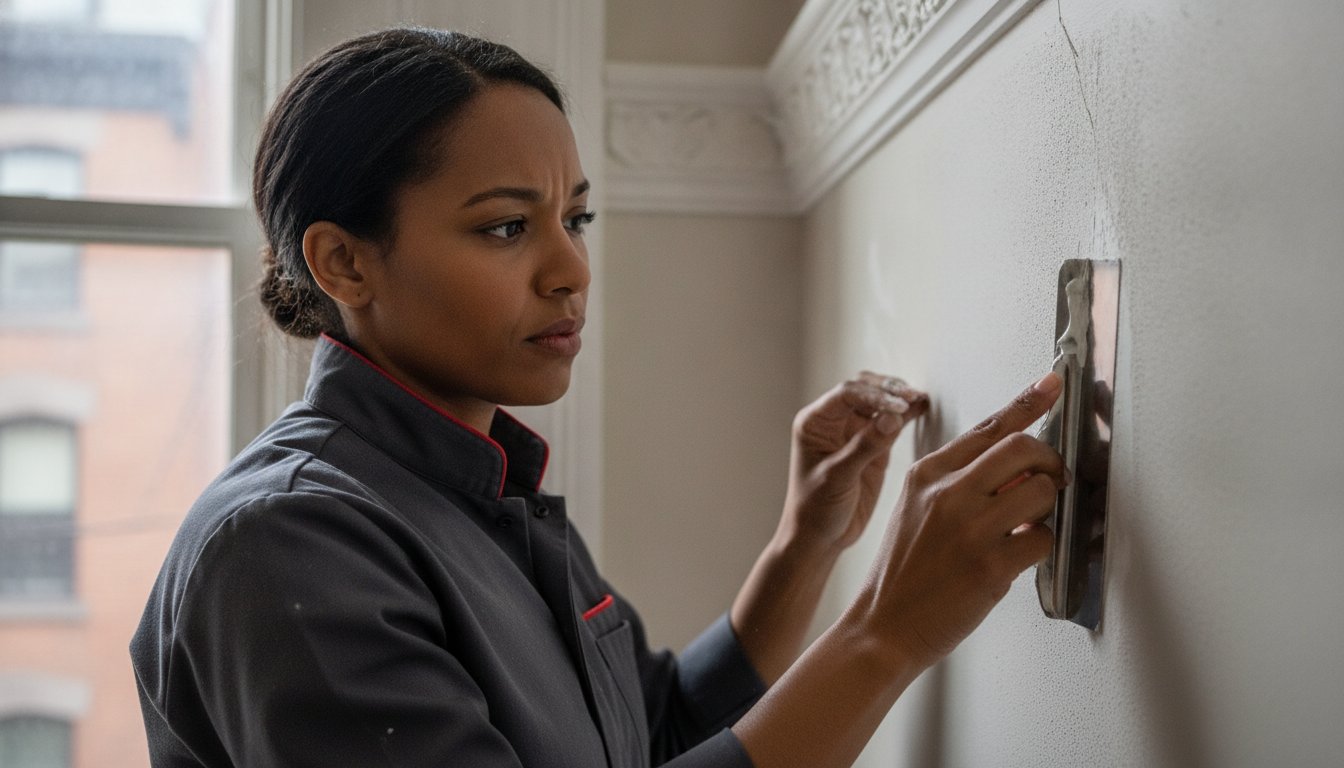
Most homeowners treat a plaster crack like a simple cosmetic blemish, but in a historic New Jersey home, that hairline fracture is often a sign that the bond between your walls and their support system is under stress. You have likely tried the standard hardware store spackle only to see the same line reappear six months later. It is exhausting to deal with the recurring dust and the nagging anxiety that your home’s structural integrity might be at risk. If you find the stress of home preservation overwhelming, you can explore Outpatient Medical and Behavioral Health Services to find professional support. When you are fixing plaster cracks on old walls, the goal shouldn't be a temporary patch; it should be a lasting restoration that honors the craftsmanship of the original builders.
We understand that your home is your most significant investment, and we are here to provide the technical precision needed to protect it. This guide will teach you how to identify the root cause of wall failure, stabilize the underlying lath, and apply professional-grade materials for a permanent fix. We will move through a proven, step by step process that eliminates the guesswork and results in a smooth, paint-ready surface. By the end of this article, you will have the confidence to transition from frustrating temporary fixes to a durable solution that keeps your historic interior beautiful for decades to come.
Key Takeaways
- Learn how to distinguish between minor cosmetic issues and the specific structural shifts common in historic New Jersey homes.
- Discover why standard hardware store patches fail and how to avoid the "rigidity trap" that causes recurring cracks.
- Master professional techniques for fixing plaster cracks on old walls by re-establishing the mechanical bond between the plaster and the lath.
- Understand how to use the "scale test" to determine when a repair is a safe DIY project or requires a professional craftsman.
- Get expert advice on selecting high-build primers and paint sheens that effectively mask imperfections for a historically accurate finish.
Identifying the Types of Plaster Cracks on Old Walls
Historic homes in New Jersey, particularly in counties like Hudson, Essex, and Passaic, rely on a wall system that is fundamentally different from modern construction. While modern homes use mass-produced gypsum drywall panels, older residences feature a hand-applied lath and plaster system. Understanding What is Plaster helps clarify why it behaves so differently. This traditional method involves nailing thin strips of wood lath to the wall studs and applying several layers of wet plaster. As the craftsman pressed the wet mixture against the lath, it oozed through the narrow gaps and curled over the back of the wood. Once hardened, these curls are known as "keys." These keys are the primary mechanical bond holding the heavy plaster to your home's frame. When they break due to age or movement, you will find yourself fixing plaster cracks on old walls to prevent the surface from collapsing.
Identifying the specific type of crack is the first step toward a permanent restoration. Most damage falls into three categories:
- Hairline Cracks: These are thin, shallow lines that usually only affect the finish coat. They are often purely aesthetic but can indicate the start of drying issues.
- Map Cracks: These look like a spiderweb or a dried lake bed across a large area. They suggest the plaster is de-bonding or pulling away from the lath because the internal keys have failed.
- Structural Cracks: These are wide, often diagonal, and may run from the corner of a door or window toward the ceiling. These indicate movement in the house's bones.
Hairline vs. Structural: When to Worry
You can often determine the severity of a crack with a simple "pencil test." If a crack is wide enough to insert the tip of a pencil, it is no longer a cosmetic issue. While thin cracks often stem from seasonal expansion, wider gaps may signal foundation settling or even a hidden roof leak that has softened the plaster from behind. If the wall feels "spongy" or moves when you press on it, the keys have detached. This is a priority repair; at this stage, fixing plaster cracks on old walls is about safety as much as beauty.
The Role of NJ Climate in Plaster Movement
New Jersey's climate is particularly harsh on historic materials. In counties like Union and Passaic, where many homes were built before 1940, the wood lath behind your walls acts like a sponge. During humid North Jersey summers, the wood expands. In the winter, forced-air heating dries the interior air, causing the lath to shrink and pull against the rigid plaster. This constant cycle of tension puts immense pressure on the keys. Additionally, homeowners in urban areas like Trenton or Passaic often face vibration fatigue. Constant heavy traffic and public transit vibrations can slowly rattle old plaster until the keys snap, leading to the cracks you see today.
Why Traditional Patching Fails on Historic Plaster
Many NJ homeowners reach for a tub of standard joint compound the moment they see a crack. While this works for modern drywall, it's often the wrong choice for fixing plaster cracks on old walls. This is because of the "Rigidity Trap." Modern joint compound dries into a hard, brittle plug. Old lime plaster remains slightly flexible and is constantly moving with the house. When the house shifts, the brittle patch can't move with it. It simply pops out or cracks again within months. This cycle of failed patching is why many historic interiors in towns like Montclair or Jersey City look perpetually unfinished.
The problem deepens when you consider material expansion rates. Wood lath, plaster, and modern spackle all react differently to New Jersey's temperature swings. If you just paint over a moving crack, the paint will peel away as the gap widens and narrows. You aren't just fighting an aesthetic issue; you're fighting physics. Adding weight to a wall where the keys have already failed is particularly dangerous. If the bond between the brown coat and the lath is broken, slathering on heavy, wet compound adds weight to a system that's already failing. On ceilings, this is a serious safety concern. For a deeper look at preservation standards, the National Park Service provides a technical guide on Repairing Historic Flat Plaster that we highly recommend for any homeowner serious about their home's longevity.
The Mechanics of Plaster De-bonding
You can identify where the plaster has detached from the lath by using the "hollow sound" test. Gently tap the wall with your knuckles. A solid wall sounds dull and firm. If you hear a high-pitched, drum-like echo, the plaster has de-bonded. Gravity is the primary enemy here, especially for ceiling repairs. Without mechanical stabilization, a heavy patch will eventually pull the surrounding plaster down. If you find that large sections of your wall sound hollow, our team provides expert Drywall & Plaster Repair to ensure your historic home remains structurally sound and safe for your family.
Materials Matter: Modern vs. Traditional Compounds
Professional restoration requires choosing between setting-type compounds, often called "hot mud," and drying-type compounds. Hot mud undergoes a chemical reaction to harden, which provides superior strength and less shrinkage. We strictly avoid lightweight spackle for historic restoration because it lacks the density to support old plaster. For a truly permanent fix, we often use specialized plaster washers or injection adhesives. These tools re-establish the bond with the lath rather than just filling a gap. It's a meticulous process, but it's the only way to ensure the crack doesn't return next season.
Step-by-Step: How to Fix Plaster Cracks Permanently
Achieving a permanent result when fixing plaster cracks on old walls requires a shift from superficial patching to structural stabilization. Most homeowners make the mistake of filling a crack without addressing the underlying movement we discussed in the previous section. Our proprietary framework focuses on re-establishing the wall’s integrity before the first layer of compound ever touches the surface. This systematic approach ensures your restoration adheres to Plaster Restoration Best Practices and withstands the seasonal shifts common in New Jersey homes.
Preparation is the foundation of a successful repair. You must start by removing loose debris with a utility knife or a painter's tool. It is essential to widen the crack into a "V" shape. This creates a larger surface area for the new material to grab. If you skip this step, the patch will sit on the surface like a scab rather than becoming an integrated part of the wall. Once the crack is widened, use a vacuum to remove every trace of dust, as even a small amount of grit can prevent proper adhesion.
The Stabilization Phase: Re-securing the Wall
If the wall sounds hollow or feels spongy, you must re-secure it to the underlying structure. Plaster washers are small, perforated metal discs that you screw through the plaster and into the wood lath or studs. They pull sagging sections back into place and provide a firm base for your finish work. For cracks where the plaster is still firm but the keys have snapped, we often use injection adhesives to create a new bond without removing the original material. Re-keying is the process of restoring the mechanical bond between plaster and lath.
When bridging the gap, fiberglass mesh tape is vastly superior to paper tape for historic interiors. Mesh provides a flexible, high-strength skeleton that resists the micro-movements of old timber frames. Paper tape often fails in North Jersey homes because it can bubble or peel when the humidity fluctuates rapidly between summer and winter.
Mastering the Three-Coat Application
We utilize a disciplined three-coat method to ensure the repair is invisible. The first coat uses a setting-type compound to fill the depth of the crack and provide structural strength. The second coat embeds the mesh tape and extends several inches beyond the repair to begin the feathering process. The final finish coat is feathered out 10 to 12 inches on either side. This wide taper is what makes the repair disappear under critical lighting. Once dry, a light sanding and a high-quality primer prepare the surface for a flawless paint finish that honors your home's historic character.

DIY vs. Professional Plaster Repair: Assessing the Damage
Deciding whether to pick up a trowel or pick up the phone is a common dilemma for owners of historic New Jersey properties. While fixing plaster cracks on old walls can be a rewarding weekend project for minor hairline issues, the technical demands of large-scale restoration often exceed the capabilities of a standard DIY toolkit. Safety is our primary concern when assessing these projects. Because the majority of NJ homes built before 1978 contain lead-based paint, any sanding or scraping can release hazardous dust into your living space. While we don't provide lead abatement services, we respect these risks by following strict site etiquette and containment protocols to protect your home’s environment.
You should use the "Scale Test" to determine the project's scope. A single crack might seem manageable, but if you press on the wall and feel a 10-foot section of plaster moving independently of the lath, you aren't looking at a simple patch; you're looking at a potential collapse. Professional restoration requires specialized tools like hawks and curved trowels, along with the patience to apply multiple thin layers. If you lack experience with these tools, the time investment can be overwhelming. For many, the cost-benefit analysis favors hiring a specialist. You can learn more about the technical differences in our guide to expert drywall and plaster repair, which highlights how we achieve seamless results in half the time of a DIY attempt.
When to Call a Professional Painter or Contractor
Certain red flags indicate that a repair is beyond the scope of a homeowner. If you see brown staining or soft spots, there is likely active water damage or mold growth behind the plaster that must be addressed first. In these instances, a professional evaluation from Floodsafe Restoration LLC can help identify the source of the leak and remediate any mold before you proceed with cosmetic repairs. Large, bulging ceiling cracks are particularly dangerous and pose a physical collapse risk that requires immediate stabilization. Additionally, if your home features complex decorative plaster molding or cornices, these architectural details require the hand of a craftsman to preserve their historic value.
The Value of Professional Prep for Painting
The secret to a high-end paint job isn't just the paint; it's the meticulous preparation of the surface. We provide the technical expertise to achieve a level 5 finish, even on old, wavy walls that have seen a century of settling. Our process includes advanced dust containment systems to ensure your home stays clean throughout the repair. By stabilizing the wall professionally, we create a durable foundation that prevents new cracks from telegraphing through your fresh coat of paint. If you want to ensure your walls are perfectly prepared for a transformation, request a professional assessment from our team today.
Restoring the Beauty: Finishing and Painting Your Repaired Walls
The structural work of stabilizing and re-keying your walls is complete. Now, the final transformation begins. Finishing is where technical precision meets artistic craftsmanship. If you have followed our guide on fixing plaster cracks on old walls, your surface is flat, but it's not yet ready for a topcoat. Plaster is incredibly thirsty. If you apply paint directly to a fresh patch, the repaired area will absorb the moisture differently than the surrounding wall. This creates "flashing," a dull or shiny spot that reveals the repair even under several coats of paint. It's a common frustration that can ruin a premium restoration.
We recommend a high-build primer to level out the microscopic differences between the old plaster and the new compound. Before you open a can of paint, conduct a final inspection using a high-intensity light held parallel to the wall. This "critical lighting" technique highlights ridges or dips that are invisible in normal light. If you find a shadow, a light skim coat or final sanding is necessary. Old walls aren't perfectly flat; they have a gentle "wave" that is part of their historic charm. A professional finish respects this texture rather than trying to force a sterile, modern look that feels out of place in a Victorian or Colonial NJ home.
Priming and Paint Selection for Plaster
Choosing the right primer is the difference between a temporary fix and a lasting restoration. Oil-based or specialized shellac-based primers are the industry standard for sealing historic plaster because they provide a non-porous barrier that prevents flashing. When it comes to the topcoat, sheen is your best friend or your worst enemy. High-gloss finishes highlight every imperfection. We suggest flat or eggshell sheens for historic interiors, as they diffuse light and soften the appearance of minor undulations. Our home painting services prioritize this level of detail, ensuring that the repair and the finish are perfectly integrated for a cohesive, premium result.
Long-term Maintenance for Historic Walls
Preserving your home's interior requires a proactive approach to the exterior and the environment. Since North Jersey experiences significant humidity swings, we recommend maintaining indoor humidity levels between 35% and 50% to minimize the expansion and contraction of wood lath. Moisture is the primary cause of plaster failure. Proper power washing of your home’s exterior removes contaminants that can trap moisture against the siding, preventing it from seeping into your wall cavities. Schedule periodic inspections of high-stress areas, such as the corners above doors and windows, to catch micro-cracks before they require major intervention. By treating your walls as a living system, you ensure that fixing plaster cracks on old walls remains a rare necessity rather than a recurring chore.
Protecting Your New Jersey Heritage
Your historic home is a unique piece of New Jersey history that deserves meticulous care. We've explored how fixing plaster cracks on old walls requires more than a simple surface patch; it demands a deep understanding of structural stabilization and the impact of our local climate on wood lath. By focusing on re-establishing the mechanical bond between the plaster and the frame, you ensure your restoration remains durable and beautiful for decades. Your home is a legacy that reflects generations of craftsmanship, and preserving that character requires a disciplined approach to maintenance.
As specialists in NJ historic home restoration, we bring technical precision and a dust-controlled repair process to every project. We combine structural stabilization with premium finishing to deliver results that honor your home's original architecture while providing modern reliability. Ready to restore your historic NJ home? Get a free estimate for professional plaster repair and painting today. We're proud to partner with local homeowners to protect and transform these significant spaces. Your walls have stood for a century; let's work together to ensure they stand for another.
Frequently Asked Questions
Is it better to repair old plaster or replace it with drywall?
Repairing original plaster is almost always the superior choice for historic homes. Plaster provides better soundproofing, higher fire resistance, and a more authentic aesthetic than modern drywall. Replacing it is a labor-intensive process that can strip away your home's character and decrease its market value. Most restoration experts recommend stabilization over replacement to maintain the property's structural integrity and historic charm.
How do I know if a crack in my plaster is structural?
Structural cracks are typically wider than a pencil lead and often run diagonally from the corners of doors or windows. If you notice the crack widening quickly or if the wall feels spongy when pressed, the issue likely involves foundation settling or weight-bearing stress. While hairline cracks are often a result of seasonal humidity changes, these larger gaps require a professional assessment to ensure your home remains safe.
Can I use regular spackle to fix plaster cracks?
You should avoid using lightweight spackle for fixing plaster cracks on old walls because it is too brittle. Regular spackle shrinks as it dries and cannot handle the micro-movements of an aging timber frame. For a permanent fix, you need setting-type compounds that undergo a chemical reaction to harden. These materials provide the density and strength required to bond effectively with the original lime plaster.
What causes plaster to pull away from the lath?
Plaster detaches when the mechanical "keys" that curl behind the wood lath break off. This failure is often caused by long-term moisture exposure, structural shifting, or even the constant vibrations from heavy NJ traffic and local transit lines. Once these keys are gone, gravity pulls the heavy plaster away from the lath. This creates the hollow sound and bulging appearance often seen in neglected historic interiors.
How much does it cost to professionally repair plaster walls in NJ?
The cost of professional repair in New Jersey depends on several factors, including the extent of the de-bonding and the height of the ceilings. Factors like the number of failed keys, the presence of decorative molding, and the required finish level all influence the final investment. We provide detailed assessments to help homeowners understand the specific requirements for their unique restoration project without the guesswork of generic estimates.
Do I need to worry about lead paint when fixing old plaster?
Yes, lead paint is a significant concern for any New Jersey home built before 1978. Sanding or scraping old plaster can release toxic lead dust into your air and onto your furniture. It is essential to test your walls before beginning any repair work. Professional contractors use advanced dust containment systems and HEPA filtration to manage these risks and keep your family safe during the restoration process.
Why do my plaster cracks keep coming back after I fix them?
Cracks usually return because the repair only addressed the surface instead of the underlying movement. If you don't stabilize the lath or use fiberglass mesh tape to bridge the gap, the natural expansion and contraction of your home will break the new patch. Fixing plaster cracks on old walls requires re-establishing a mechanical bond so the wall can move as a single, unified system again.
How long does plaster repair take to dry before I can paint?
While setting-type compounds might feel hard to the touch within 90 minutes, you should wait at least 24 to 48 hours before priming. The patch must be completely dry to ensure proper adhesion of the primer and paint. In humid New Jersey summers, this drying time might extend slightly. Painting too early can trap moisture, which leads to bubbling, peeling, or a "flashed" finish that ruins the repair.


