

You've finally peeled away the last strip of dated floral wallpaper, only to find a sticky, gouged mess that looks more like a construction zone than a living room. It's a frustrating realization many New Jersey homeowners face, especially when dealing with the historic plaster or aging drywall common in Bergen and Hudson County homes. Understanding how to prepare walls for painting after wallpaper removal is the critical difference between a failed project and a professional-grade finish. You want a fresh start, but the fear that your new paint will bubble or peel over stubborn adhesive residue is a completely valid concern.
We've developed a meticulous, expert-led process to help you transform rough, sticky surfaces into a flawless, paint-ready canvas. By following this guide, you'll gain the confidence that your new color will adhere permanently and add genuine value to your space. We'll walk you through the essential steps of adhesive neutralization, lead safety precautions for older properties, and the technical sealing with professional primers like Zinsser 1-2-3 to ensure your walls look smooth and sophisticated for years to come.
Key Takeaways
- Learn why even invisible wallpaper paste ruins new paint and how to perform a "sticky test" to ensure every trace of residual adhesive is gone.
- Master the technical process of how to prepare walls for painting after wallpaper removal, including neutralizing chemicals and repairing deep tool gouges.
- Discover the critical differences between patching modern drywall and restoring the historical plaster surfaces common in Bergen and Hudson County homes.
- Understand the "Sealing Secret" and why choosing the right professional-grade primer is the only way to prevent paint from bubbling or peeling.
- Identify the warning signs that indicate a project requires professional intervention, especially regarding lead paint safety in North Jersey homes built before 1978.
The Critical First Step: Removing Residual Adhesive and Glue
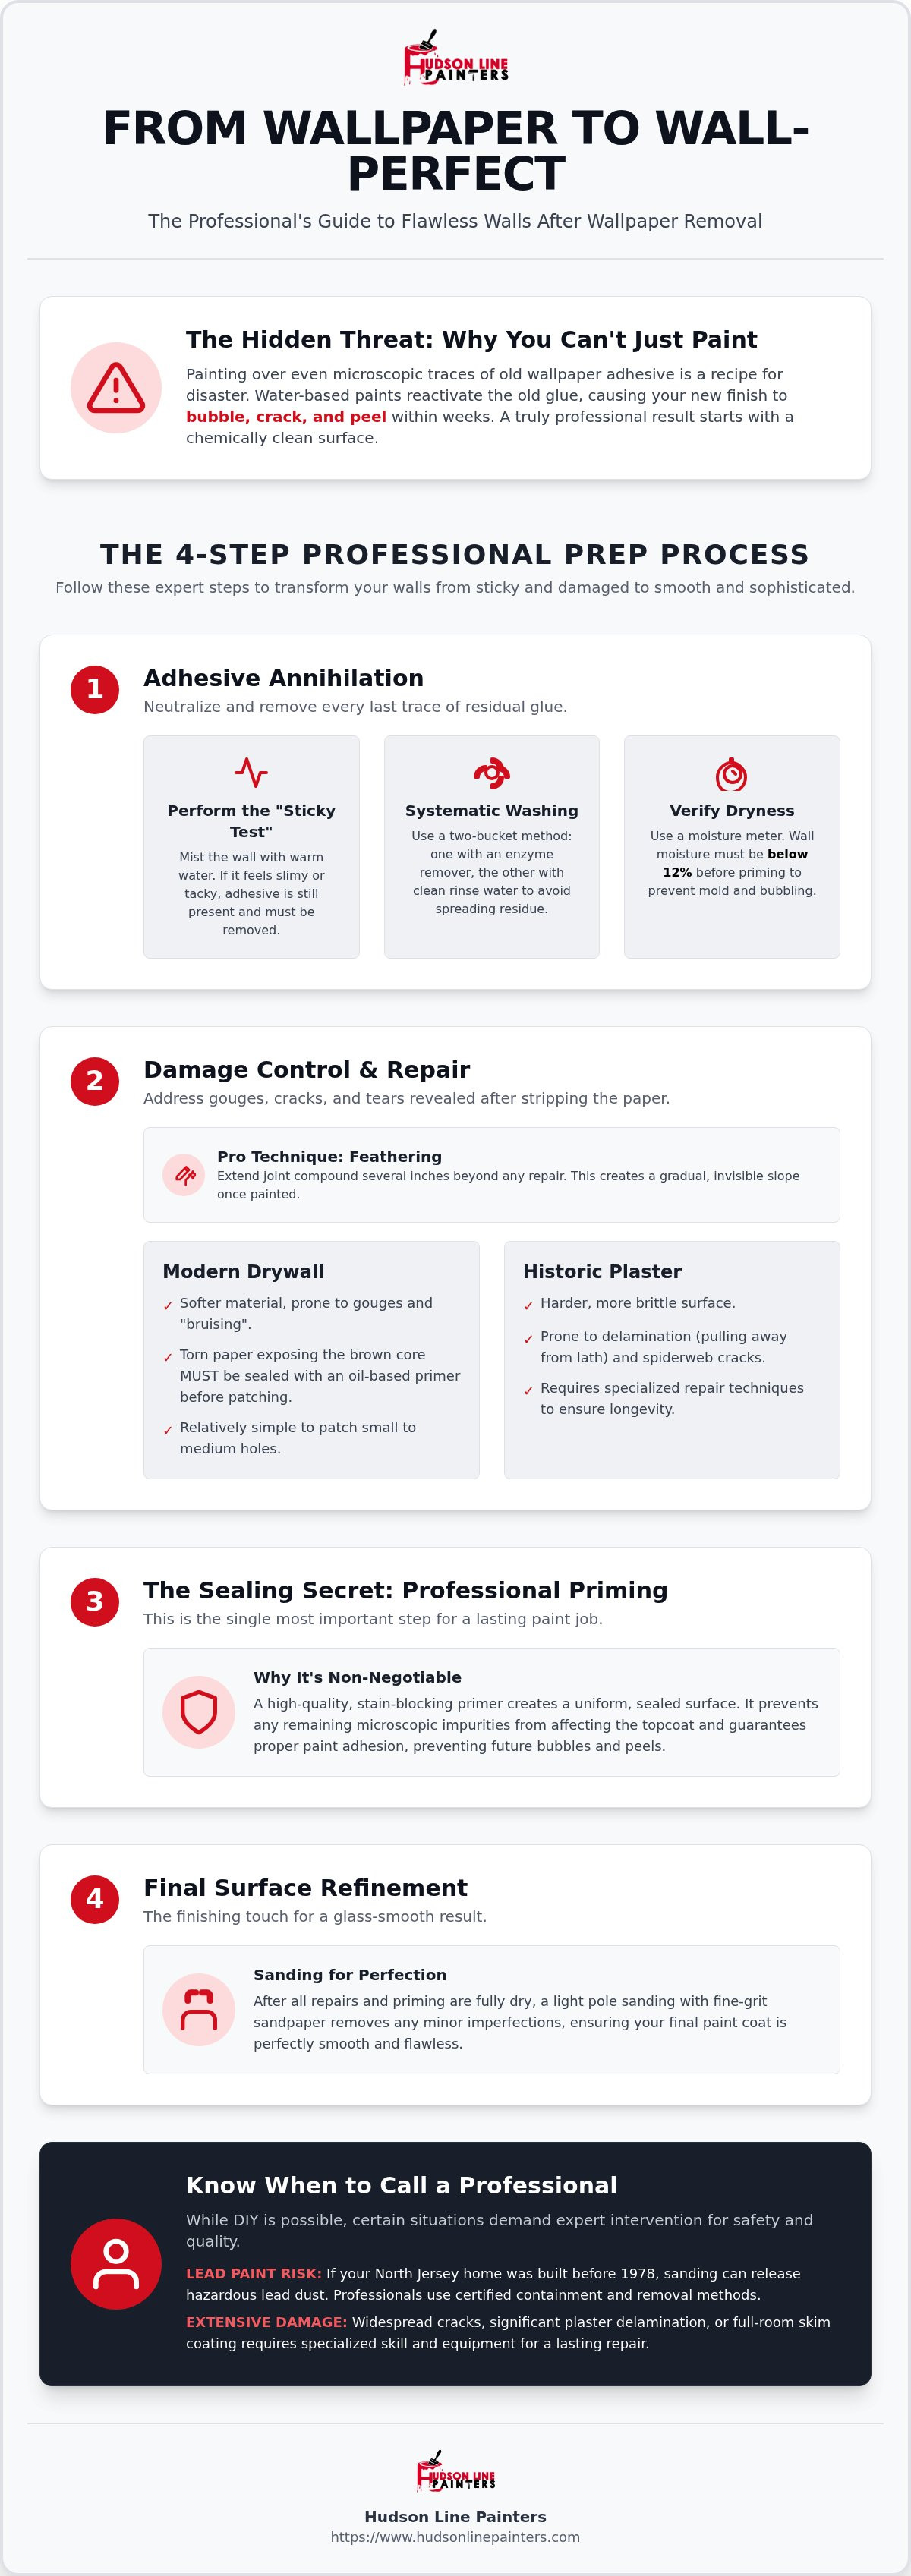
Once the decorative layer of wallpaper is on the floor, you might feel like the hard part is over. However, the most vital phase of learning how to prepare walls for painting after wallpaper removal begins now: eliminating the residual adhesive. Painting over even a microscopic layer of old paste is a recipe for disaster. Most modern interior paints are water-based; when that moisture hits old starch or clay-based glue, the adhesive reactivates. This chemical reaction causes the new paint to bubble, crack, or peel away in sheets within weeks of application. For a lasting interior painting result, the wall must be chemically and physically clean.
A foundational part of understanding drywall is recognizing its porous nature. Because the paper facing of drywall absorbs liquids, old adhesive often settles deep into the surface. To identify these hidden threats, we recommend the "sticky test." Mist a section of the wall with warm water and run your hand across it. If the surface feels slick, slimy, or tacky, there is still glue present. This residue must be neutralized and removed before you even consider opening a paint can. While natural solutions like white vinegar and warm water work for light residue, professional-grade enzyme removers are often necessary for the stubborn adhesives found in older Bergen County homes.
Techniques for Scrubbing and Rinsing
Effective removal requires a systematic approach to prevent spreading the glue around. We utilize the two-bucket method: one bucket contains a solution of warm water and a professional-grade adhesive breaker, while the second bucket remains filled with clean, fresh water for rinsing. For stubborn areas, a Paste Identifying Tinting Spray (PITS) is an invaluable tool. This spray reacts with starch to turn invisible glue into a visible color, ensuring no spots are missed. Always protect your flooring with heavy-duty drop cloths and ensure proper ventilation, as the wet phase can significantly increase indoor humidity and odors.
Drying Times and Moisture Management
In North Jersey, our seasonal humidity plays a major role in your project timeline. A wall that feels dry to the touch may still hold moisture within the gypsum core. We use professional moisture meters to verify that levels are below 12% before moving to the next stage. Trapping moisture under a fresh layer of primer can lead to mold growth or structural softening. While some guides suggest a 24-hour wait, a humid July day in Hudson County might require 48 hours or the use of industrial dehumidifiers to ensure the surface is truly ready for restoration.
Repairing Wall Damage: Patching, Gouges, and Plaster Cracks
Once the adhesive is neutralized, the true condition of your walls becomes apparent. Stripping wallpaper frequently reveals a landscape of scars, ranging from shallow tool gouges to deep structural cracks. Understanding how to prepare walls for painting after wallpaper removal involves more than just a clean surface; it requires structural restoration. We categorize these issues into two types: mechanical damage caused by the removal process and historical settling. While a scraper gouge is a simple fix, a crack that spans from a door frame to the ceiling suggests structural movement that requires a more disciplined approach to ensure the repair doesn't fail after the first winter.
The repair strategy changes significantly depending on whether you're working with modern drywall or historical NJ plaster. In newer Bergen County developments, you'll likely face drywall, which is relatively soft and prone to "bruising." In contrast, the 19th-century homes of Hoboken and Jersey City feature plaster and lath. Plaster is harder, more brittle, and often suffers from delamination where the material has pulled away from the wooden lath behind it. We prioritize "feathering" every repair, which means extending the joint compound several inches beyond the actual damage. This creates a gradual slope that is invisible to the eye once the light hits the finished paint. If you find the damage extends across the entire room, our team provides professional residential painting and restoration to bring those surfaces back to life.
Fixing Drywall Tears and Brown Paper Exposure
If the wallpaper was applied to unprimed drywall, the removal process often tears the top layer of gray paper, exposing the brown "fuzzy" gypsum core. You cannot apply water-based spackle directly to this brown paper; the moisture will cause the paper to bubble and peel. You must first seal the area with a high-quality shellac or specialized sealer to create a moisture barrier. Once sealed, we follow a 5-step process: seal, patch with setting-type compound, sand, apply a finish coat of lightweight compound, and final sand. For a deeper look at this process, see our Expert Drywall and Plaster Repair guide.
Managing Plaster Wall Integrity in Historical Homes
In historical New Jersey homes, plaster integrity is the primary concern. Before patching, we check for "keys"—the plaster that has squeezed between the lath to lock the wall in place. If the wall feels bouncy, it must be stabilized with plaster washers or adhesive before painting. For hairline cracks that tend to reappear with NJ’s seasonal temperature shifts, we embed fiberglass mesh tape into the first layer of compound. To achieve a truly professional result, skim coating walls after wallpaper removal is often the best choice, as it provides a uniform Level-5 finish that makes century-old walls look brand new.
The Sealing Secret: Choosing the Right Primer
Choosing the right primer is the make-or-break moment for your project. If you skip this or choose the wrong product, the hours you spent cleaning and patching will be wasted. The biggest mistake we see in North Jersey DIY projects is using a standard PVA (Polyvinyl Acetate) primer. While PVA is excellent for new drywall, it is a disaster for post-wallpaper surfaces. PVA is water-based and specifically designed to soak into porous surfaces; this causes it to penetrate and reactivate any microscopic glue residue you missed. The result is a bubbly, crackled texture that ruins your finish.
A critical part of how to prepare walls for painting after wallpaper removal is creating an impermeable barrier between the old wall and the new paint. If you see "ghosting," which is the faint outline of the old wallpaper pattern bleeding through, a standard primer won't cut it. You need a high-solids sealer. Shellac-based primers are the ultimate problem solvers here. They dry incredibly fast and provide the tightest seal possible, preventing tannins, old dyes, and stubborn adhesive from migrating into your topcoat. This ensures your interior painting looks professional and stays bonded for years.
Why Oil-Based Primer is the Industry Standard
While modern water-based acrylics have improved, many professionals still prefer oil-based or shellac-based primers for post-wallpaper walls. Oil does not contain water, so it cannot reactivate starch-based glues. It also dries to a much harder shell than latex, which makes it easier to sand to a glass-smooth finish. For 2026, we recommend these three high-performance options:
- Zinsser 1-2-3 Primer: A versatile water-based acrylic that performs well if the wall is thoroughly cleaned.
- KILZ 3 Premium Primer: A heavy-bodied water-based primer that offers excellent hide and adhesion.
- Zinsser Cover Stain: Our go-to oil-based recommendation for walls with heavy adhesive residue or staining.
Application Tips for a Uniform Surface
To achieve a professional finish, you must apply your primer with technical precision. Use a short-nap microfiber roller, typically 1/4 inch or 3/8 inch, to avoid creating an orange-peel texture. You want the primer to lay flat, acting as a leveler for the repairs you made in the previous step. Start by cutting in the corners and edges with a high-quality brush to ensure 100% coverage. Any gap in the primer is a potential failure point where the topcoat could peel.
Patience is your best tool during this phase. Even if a primer is "dry to the touch" in 30 minutes, it may not be fully cured. In the humid environments of Hudson County, we suggest waiting at least 4 to 6 hours for water-based primers and up to 24 hours for oil-based products before you begin sanding or painting. A fully cured primer provides a stable foundation that adds long-term home value and ensures your paint adheres permanently.
Sanding and Final Surface Refinement
Sanding is the bridge between structural repair and aesthetic perfection. It's often the most overlooked part of learning how to prepare walls for painting after wallpaper removal. Many DIYers reach for 80-grit sandpaper to speed up the process, but this is a mistake. Aggressive grits can tear the drywall paper or leave deep scratches that show through the final paint. We recommend a "sweet spot" of 120 to 150 grit for initial leveling and 220 grit for the final pass. For large rooms in North Jersey homes, pole sanding is essential. It provides the leverage needed for a uniform surface and prevents the uneven pressure typical of hand sanding, which often creates "divots" in the joint compound.
Before you declare the walls ready, perform the "flashlight test." Hold a high-lumen light parallel to the wall surface in a darkened room. This side-lighting technique reveals every minor ridge, pinhole, or sanding mark that would otherwise remain invisible until the paint dries. Dust management is equally critical. To protect your home from fine particulates, we use HEPA-filtered vacuum sanders and seal off doorways with plastic sheeting. This meticulous care ensures your living space remains clean while we work toward a flawless result. Technical precision matters here.
Get a Professional Interior Painting Estimate
Sanding the Primer Coat
Even the best primer can leave "nibs," which are tiny specks of dust or dried paint, on the surface. Sanding the primer coat is just as important as sanding the patch. This step knocks down the roller texture and creates a "tooth" for the finish paint to grab onto. After sanding, use a tack cloth or a slightly damp microfiber towel to remove every trace of dust. If you leave dust on the wall, your expensive topcoat will have a gritty, unprofessional feel. A clean wall is a durable wall.
Achieving a Level-5 Finish
The difference between a "DIY clean" wall and a professional Level-5 finish is the second round of refinement. After the first coat of primer is sanded, you'll often see tiny imperfections you missed earlier. We apply a final round of fine-finish putty to these areas before the final sand. This creates the mirror-smooth surface required for high-sheen paints or deep, dramatic colors. If the scale of the project feels overwhelming, our Professional Interior Painting Services are designed to handle these technical details for you. We take pride in the craft of preparation.
When to Hire a Professional for Post-Wallpaper Prep
While understanding how to prepare walls for painting after wallpaper removal empowers you to tackle minor projects, the reality of a whole-house renovation often reveals hidden complexities. What starts as a weekend project in a single bedroom can quickly spiral into a month-long ordeal when you discover multiple layers of paper or failing plaster. Assessing the scale of the work is the first step in protecting your time and your home's value. If you're facing a large-scale project, the physical toll of scraping and sanding can lead to fatigue-driven mistakes that compromise the final aesthetic result.
Safety is a paramount concern for North Jersey homeowners, particularly in the historical districts of Hudson and Bergen County. Homes built before 1978 frequently contain lead-based paint beneath the wallpaper. If you aren't equipped with professional-grade HEPA vacuum systems and containment protocols, sanding these surfaces can release toxic dust into your living environment. We prioritize risk mitigation by using specialized equipment that captures particulates at the source. When you compare the wallpaper removal cost per room in NJ against the potential health risks and the stress of a failed DIY attempt, the professional route often proves to be the smarter financial and personal choice.
Complex Scenarios: High Ceilings and Stairwells
Architectural features like vaulted ceilings or multi-story stairwells present significant logistical challenges. Standard household ladders often lack the stability or reach required for meticulous adhesive removal and skimming in these areas. We utilize professional scaffolding and industrial-grade steamers to ensure a consistent finish across large, light-filled open spaces where every imperfection is magnified. This level of equipment allows us to maintain the same technical precision on a twenty-foot ceiling as we do on a standard wall, ensuring your home's architectural beauty is fully realized. We focus on technical discipline to prevent the "patchy" look that often occurs when DIYers struggle with difficult reaches.
Professional Results in Bergen and Hudson County
Local homeowners trust us for historical restoration because we treat every project as a craft rather than just a manual task. Our process doesn't just end with a smooth wall; it includes a meticulous cleanup that leaves your home in better condition than we found it. We take pride in our operational discipline, ensuring that site etiquette and technical excellence go hand-in-hand. By choosing a partner who understands the specific needs of NJ home types, you gain the peace of mind that comes with a guaranteed, flawless transformation. We invite you to Contact Hudson Line Painters for a Free Estimate and discover how we can elevate your interior space through expert preparation.
Achieving the Flawless Finish Your NJ Home Deserves
Transforming your space starts with the technical discipline we've discussed throughout this guide. We've highlighted why neutralizing every trace of adhesive is non-negotiable and how the right moisture-resistant primer prevents the frustration of bubbling paint. Mastering how to prepare walls for painting after wallpaper removal is the only way to ensure your investment lasts and your home's value increases. Whether you're restoring a 19th-century brownstone in Hudson County or updating a modern interior in Bergen or Union County, the quality of your preparation dictates the beauty of your final result. Hudson Line Painters has been providing specialized historical home wall restoration since 2018. Our 5-star local NJ reputation is built on technical precision and a commitment to meticulous care that respects your environment. You don't have to navigate the stress of sticky residues or crumbling plaster alone. We provide the expertise needed to guarantee a seamless transition from dated patterns to a professional-grade finish that feels brand new.
You deserve a home that feels fresh, clean, and perfectly finished. We're here to help you turn that vision into a reality with confidence and ease.
Frequently Asked Questions
Can I just paint over the wallpaper glue if it feels dry?
No, you cannot paint over dry adhesive. Even if the glue feels stable, the water in standard latex paint will reactivate the starch or clay, causing the new finish to crackle or peel. This is a technical failure that often requires stripping the wall back to the substrate to fix properly. We always recommend a thorough chemical cleaning to ensure a clean surface.
What happens if I don't use an oil-based primer after removing wallpaper?
Skipping oil-based or shellac-based primers usually results in "ghosting" or bubbling. Water-based primers soak into the wall and pull old glue residue to the surface. Using a non-reactive sealer is a critical part of how to prepare walls for painting after wallpaper removal to ensure the topcoat stays bonded for years and provides a professional finish.
How do I fix walls that are 'fuzzy' after stripping the paper?
"Fuzzy" walls occur when the drywall's paper facing is damaged or torn during stripping. You must seal these exposed fibers with a shellac-based primer before applying any joint compound. If you apply wet spackle directly to the fuzz, the paper will swell and create permanent lumps that are impossible to sand smooth later.
Is it necessary to sand the walls after removing wallpaper?
Yes, sanding is essential for a professional-grade result. It removes microscopic glue particles, smooths out patch edges, and knocks down "nibs" on the primer coat. We recommend a progression from 120-grit to 220-grit sandpaper to achieve the level of refinement expected in high-end Bergen and Hudson County interiors.
How long should I wait to paint after removing wallpaper?
You should wait at least 24 to 48 hours after the final rinse before painting. North Jersey humidity can trap moisture inside the drywall or plaster. A key part of how to prepare walls for painting after wallpaper removal is verifying the surface is dry with a moisture meter to ensure levels are below 12% before you begin the priming phase.
Do I need to skim coat the entire wall after wallpaper removal?
Skim coating the entire surface isn't always mandatory, but it is highly recommended for historical plaster walls. If the removal process left hundreds of tiny pits or if you desire a Level-5 mirror finish, a full skim coat provides the most uniform surface. It effectively erases the wall's history of previous coverings for a modern look.
Can I remove wallpaper and paint the same day?
You cannot remove wallpaper and paint on the same day. The wall requires significant time to dry completely after the wet removal process. Additionally, the multi-stage repair and priming sequence involves specific cure times that simply cannot be rushed without compromising the durability and aesthetic quality of the final paint job.
What is the best way to remove stubborn glue residue from plaster?
The best way to remove stubborn glue from plaster is using a professional-grade enzyme solution and a systematic scrubbing method. Plaster is more durable than drywall, so you can use slightly more moisture and a stiffer scrub brush to break down the starch. This ensures every trace of residue is neutralized before you begin the restoration phase.


